|
Merry Meet,
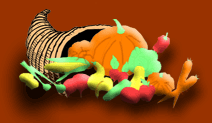
Welcome Back to the Garden. This time of year is so exciting for me. I have been enjoying the fruits of my gardens on a nearly daily basis. I have brought in my lettuce crops, cucumbers, early tomatoes, and beans. Ive harvested and dried some of my herbs and started to mix my teas for the winter season. I have let whats left of my dill go to seed and though i will leave some fall naturally off the plant for next year I will storesome as well. Which brings us to this months feature saving seeds. I hope you find this information useful. Blessings Hazel Not so long ago, seed saving was part of every garden. From ancient times until our grandparents day, favorite strains of vegetables and flowers were renewed from year to year and generation to generation, sometimes travelling long distances with a family to a new homeland.
By the 1880s, seed companies had begun to make hybrid seeds widely and inexpensively available, and by the early 20th century many gardeners no longer saved their own seed, relying instead on the seed companies to provide new and improved varieties each year. Nearly a century later, it is uncommon to find a gardener who saves seed. Why go to the trouble of saving seed when we can just buy more next spring? Here are six reasons:
1.Waste not, want not. Saving seed appeals to the thrifty nature which hates to see any good thing go unused or unappreciated. The seed saver knows the satisfaction of gathering up seed, storing it carefully away for next year's garden, preserving for another season some nearly-forgotten but praise-worthy plant.
2.Suit yourself. Hybrids may boast hardiness and disease resistance, but you can develop your own vigorous strains over several seasons of selective seed saving. And by saving seed from the plants with the qualities you most prize, you will soonhave varieties that are ideally adapted to your garden andgrowing conditions. As an added plus, many heirloom vegetable gardeners assert that although old varieties are not always prettier than modern types, they are usually tastier!
3.Maintain genetic diversity. A compelling ecological argument for seed saving. As fewer and fewer old varieties of food crops are maintained, the gene pool grows smaller and smaller, and with this diminution comes increased susceptibility to sweeping disease and pest outbreaks, as well as less vigorous gene material for future hybridization. Many ecologists warn that this could prove catastrophic. Seed saving keeps the vegetable and herb world heartily diversified.
4.Practice living history. Seed saving fosters an awareness of the seamless fabric of life and time that we call history. The plant varieties themselves are living links to times past. The activity of seed saving is one we share with untold generations of ancestors. And we are reminded of our responsibility and opportunity to pass these treasures on to future generations.
5.Self-Reliance. Perhaps we are too quick to believe that certain tasks are beyond our skills, and too willing to allow a company somewhere to take care of them for us. As Marc Rogers writes in Saving Seeds, "Any small measure of self-reliance we can recapture in our overly dependent society is cause for satisfaction." Or as Ralph Waldo Emerson asserts in his essay Self-Reliance, "Trust thyself: Every heart vibrates to that iron string."
6.Go full circle. By saving seed we participate in an essential part of the life cycle, a part that we miss when we delegate this task to seed companies. The unbroken circle of birth, growth, death and rebirth has awed and inspired mankind from our earliest recorded history. In our gardens, saving seed from season to season, we too can enjoy and take inspiration from the endless cycles of nature. Stored away in a jar, seeds cannot remain viable for long. To preserve them we must plant them, nurture them, let them mature and bear fruit to begin the cycle again.
Storing Seeds for Longevity
How you prepare and then store your seeds can be as important to their eventual viability as how they were grown. Seeds must be carefully dried and then stored under the proper conditions in order to give the seeds the best chances of germinating and producing healthy plants when they are planted. Luckily, all the needs of seeds are easily provided once you are aware of their requirements.
Preparing Seeds for Storage
Most of the garden plants with which we are familiar produce desiccation-tolerant seeds, which means they can be safely dried for long-term storage. Exceptions include many aquatic plants, large-seeded plants, and some trees (such as oaks and buckeyes), many of which produce desiccation-intolerant seeds which will die if allowed to dry.
Properly Drying Desiccation-Tolerant Seeds
Desiccation-tolerant seeds should be slowly dried in a shady spot. Spread seeds one or two thick in an airy, dry locationsuch as an air-conditioned environment or other place where relative humidity stays between 20% and 40%for two or more weeks. Large seeds must be dried longer than smaller seeds. When dry, corn and beans will shatter when hit with a hammer, squash seeds will break instead of bending. Seeds which pass this test are dry enough for safe short-term storage.
Using Silica Gels For Final Drying
Seeds air-dried during humid weather require additional drying with desiccants such as silica gel before final storage (but don't use heat!). Most seeds benefit from drying with silica gel if they are to be stored for very long. Seeds dried to a low moisture content with silica gel and then stored in a freezer can usually retain viability for many years.
To use silica gels for drying seeds, place equal weights of silica gel and seeds to be dried in a well-sealed jar for 7 to 8 days. Then transfer the dried seeds quickly into airtight storage jars and place in a freezer, refrigerator or other cool, dark place.
Carefully follow the instructions which come with your silica gels for drying them after use, to avoid burning them and rendering them useless. I have also used powdered milk as a drying agent.
Storing Desiccation-Tolerant Seeds
Since seeds stop almost all metabolic activity as they mature and dry, they can be stored for months or even years with only minor loss of viability and vigor. Seeds which show high germination percentages when freshif properly dried and stored in a freezercan typically retain their viability for years.
Seeds with low initial germination rates will begin to lose viability fairly quickly, however, even under ideal storage conditions. Seed lots with a low initial germination rate should be regrown as soon as possible. If a batch of seeds with poor germination is grown out and a healthy batch with good germination produced from them, the healthy batch can then be dried, frozen and stored for long periods successfully.
Avoiding Problems With Stored Seeds
Mold and Mildew
A common problem with stored seeds is mold or mildew resulting from incomplete drying before storage. Dry your seeds thoroughly before storing them (though drying them to 0% moisture will of course cause their death). If seeds sweat on insides of jars during storage, they are too wet and must be dried further in order to store successfully. At this point the use of a desiccant is a good idea. Don't tarry, because damp seeds will mildew quickly.
Temperature and Moisture Fluctuations
Fluctuation in temperature or moisture levels of stored seeds lowers the seeds' longevity significantly, causing loss of viability and vigor or even seed death. Rapid moisture fluctuations are particularly damaging to seeds. High moisture or temperatures encourage mutation of seed tissuesespecially in root tips, which remain more active than other seed tissues. Cellular mutations affecting metabolism or root tissue structure are a common cause of seed failure upon germination.
Dry your seeds properly before placing them in cold storage. Keep the seeds at a constant temperature if possible and remove them from storage as seldom and as few times as possible. When seeds are removed from cold storage in order to retrieve samples, allow the entire container to come slowly to room temperature before opening the seal. This will help prevent condensation of atmospheric moisture onto the cold seeds which might otherwise occur.
Insects
Another common problem with stored seeds is infestation by weevils or other insects. In fact, it is best to assume that some insects are present in any sample of seeds. Seeds kept in frozen storage are safe from insect damage, sincethough insects may survive the freezingthey will be rendered inactive during frozen by the low temperature. Even if your seeds will be stored frozen, however, it doesn't hurt to take precautionary measures against insects.
Insect infestations may be guarded against by the addition of a little diatomaceous earth (D.E.available at organic gardening stores) to the stored seeds in their jars. Add just enough D.E. to cover the surfaces of the seeds (add a few pinches to the seeds in a bowl and gently stir to thoroughly cover each seed). Adding D.E. to jars of stored seeds helps insure the long-term safety of your seed stocks and is an inexpensive, safe, non-toxic and wise precaution.
Plant-Specific Seed-Saving Tips
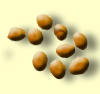
Amaranth, Amaranthus spp.
Amaranth is self-pollinating but will also cross-pollinate (possibly even between different species). Further, wild amaranths are common in most areas worldwide Grain amaranth plants may need support to keep them from falling over as they mature because of their large, heavy seed heads. Collect seed heads as they dry on the plants and store in closed paper bags to finish drying (many of the seeds will shed naturally). Chaff easily blows away after seed heads are crumbled (watch for thorns or prickles in some plants). Amaranth seeds can last for many years if properly stored, and can sprout in the garden even after several years in the soil.
Basil, Ocimum basilicum
Basil seeds rely on insects for pollination. Different basil varieties will cross each other.
Harvest seed heads as they dry and allow to finish drying in a warm, dry spot. Seeds are easily removed by crumbling the dried flower heads and then blowing away the chaff. Plants cut back after harvest will grow another set of leaves and even produce seeds again if your season is long enough. Basil seeds will last up to 5 years if properly stored.
Broomcorn, Sorghum bicolor
Broomcorn seeds will last 4 years if stored properly.
Cantaloupe, Cucumis melo
Cantaloupes rely on insects for pollination. Pick cantaloupes for seed-saving when the tendril nearest the melon is completely dried, then store the harvested cantaloupe for 3 weeks before removing and cleaning the seeds. Cantaloupe seeds will keep for up to 5 years if properly stored.
Carrots, Daucus carota
Insect-dependent carrotsincluding wild and cultivated varieties of Queen Annes's Lace. Allow seeds to ripen and dry on the plant before harvesting and cleaning. Carrot seeds will last up to 3 years if properly stored.
Chives, Allium shoenoprasum
Commonly reproduced by division of bulbs in the garden, insect-pollinated chives also produce viable seeds. Crosses only with other chives (except Garlic chives, A. tuberosum. Short-lived Allium seeds will last one or two years if properly stored.
Cilantro, Coriandrum sativum
Quick-to-bolt cilantro (or coriander) crosses only with other cilantro varieties . Allow seeds to dry completely on plants before harvesting.
Dill, Anethum graveolens
Dill is insect pollinated and different varieties . Harvest individual heads as they dry on the plants, since they ripen over a period of time. Dill seeds remain viable for 3 or more years if properly stored.
Fennel, Foeniculum vulgare
Fennel will cross only with other Fennel varieties . Allow umbels to dry completely on plants before harvesting seeds. Properly stored, fennel seeds will keep for 3 or more years.
Gourds, Lagenaria siceraria
Gourds can cross other hard-shelled gourds (except ornamental colored striped or warty 'gourds', which are Cucurbita pepo) . Allow gourds to dry on the vines before harvesting for seeds.
Lamb's Quarters, Chenopodium spp.
There are two species of lamb's quarters, the green (C. alba) and the magenta-centered (C. giganteum). Varieties in the same species will cross, but green and magenta lamb's quarters will not cross each other. Allow seed heads to dry on the plants, then hang upside-down in paper bags to finish drying. Many of the tiny seeds will fall out naturally, and the remainder can be crumbled from the heads and winnowed.
Lettuce, Lactuca sativa
Lettuce is self-pollinating, but plants can cross under some circumstances. Gather dried seed heads (they are easy to recognize) every couple or three days as they ripen and dry, or wait until most seed heads have dried and hang the plant upside down over a tarp or in a paper bag (harvest dry seeds if rains threaten). Lettuce seeds can remain viable for 3 years if properly stored.
Parsley, Petroselinum crispum
Insect-dependent and biennial, parsley can cross other parsley varieties . Parsley seeds can be kept for 2 or 3 years if properly stored.
Sunflower, Helianthus spp.
Allow sunflower heads to dry on the plants before harvesting whole heads and hanging them upside-down in a protected spot to complete drying. The seeds can then be removed from the heads by vigorous rubbing. Store and plant the seeds in their kernels for protection. Sunflower seeds can be kept for 5 or more years if properly stored.
|